Dynamic Environment Variables in Dockerized Next.js: A Flexible Multi-Environment Solution

When building a Next.js application, managing environment variables across different environments becomes challenging, particularly when deploying with Docker. Typically, environment variables are accessed using process.env.VARIABLE_NAME, which works well for server-side code. However, since the browser doesn’t have access to the server’s runtime variables, we’re restricted to using environment variables embedded during the client bundle build process.
In cases where process.env is accessed in client-side code, Next.js compiles these variables by embedding their values directly into the generated JavaScript. For example, the following code:
const apiURL = process.env.NEXT_PUBLIC_API_URL;
is transformed at build time into:
const apiURL = "https://api.example.com";
Here, https://api.example.com is the value of the NEXT_PUBLIC_API_URL environment variable at build time.
This behavior makes it impossible to change environment variables without rebuilding the application, limiting flexibility in dynamic environments such as development, staging, or production. This limitation directly violates the 12-factor app methodology.
In this blog, I’ll guide you through a practical solution to this problem: dynamically replacing environment variables at runtime using a custom Docker entrypoint. This method ensures your Next.js app stays flexible and adaptable, eliminating the need to rebuild the image whenever environment-specific values change. By the end, you’ll have a Docker-friendly setup that supports dynamic environment variables, making deployment across different environments seamless and efficient.
Preparing the Next.js Application#
Let’s imagine we have a Next.js application where we need to define two key environment variables: the environment name and an API URL. These values will be used on the client side, and we’ll need different values for development, staging, and production environments:
Development environment:
env: “dev”apiURL: “https://dev-api.example.com”
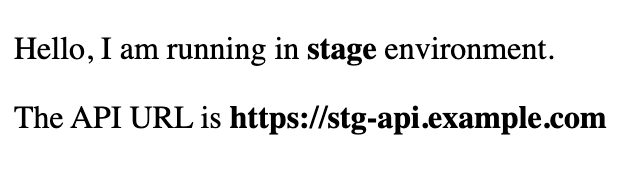
Staging environment:
env: “stage”apiURL: “https://stg-api.example.com”
Production environment:
env: “prod”apiURL: “https://api.example.com”
Defining Environment Variables in next.config.ts#
To make these variables available to the client side, we’ll define them using publicRuntimeConfig in next.config.ts. This allows us to access environment-specific values dynamically during runtime (at least in theory):
import type { NextConfig } from "next";

const nextConfig: NextConfig = {
  publicRuntimeConfig: {
    env: process.env.NEXT_PUBLIC_ENV,
    apiURL: process.env.NEXT_PUBLIC_API_URL,
  },
};

export default nextConfig;
Using Environment Variables on the Client Side#
Once the environment variables are defined in next.config.ts, we can access them in any client-side code, such as a page or component. In this example, I’ve added a simple Home page that displays the current environment and API URL using the values from publicRuntimeConfig:
import getConfig from "next/config";

export default function Home() {
  const { publicRuntimeConfig } = getConfig();

  return (
    <div>
      <p>Hello, I am running in <b>{publicRuntimeConfig.env}</b> environment.</p>
      <p>The API URL is <b>{publicRuntimeConfig.apiURL}</b></p>
    </div>
  );
}
Now we can run the project with specific environment variables using the following command and see the result displayed on the page:
NEXT_PUBLIC_ENV=dev NEXT_PUBLIC_API_URL=https://dev-api.example.com yarn dev
This command sets the environment variables NEXT_PUBLIC_ENV and NEXT_PUBLIC_API_URL for the local development server. Once the server starts, open the browser to view the page, and you should see something like this:
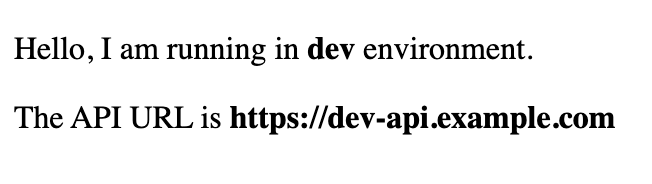
At this point, the environment variables are correctly reflected in the client-side bundle during local development. However, this approach works only because the environment variables are injected before the build starts. When using Docker, we’ll encounter the same problem: the values are locked at build time, making it impossible to change them without rebuilding the app for each environment.
In the next section, we’ll look at how to solve this by using Docker to inject environment variables dynamically at runtime.
Replacing Environment Variables at Runtime Using Docker Entrypoint#
I assume you already have a working Dockerfile for your Next.js project. Since creating a functional Dockerfile is beyond the scope of this blog, we’ll focus on how to enable dynamic environment variable replacement at runtime using a custom Docker entrypoint.
The idea is simple: instead of embedding the actual values of environment variables during the build phase, we’ll use placeholders in the client bundle. Then, when the Docker container starts, we’ll replace these placeholders with the actual values using a script in the entrypoint.
Prepare the Environment#
As mentioned earlier, we need to use intermediate values for our environment variables to simplify the replacement process. These placeholders will later be replaced with actual values passed via environment variables at runtime. The easiest way for Next.js to pick up these intermediate values is by using a .env file. You can create this file under .env.docker, .docker/.env, or any other location you prefer. Personally, I use .docker/.env:
NEXT_PUBLIC_ENV=_NEXT_PUBLIC_ENV_
NEXT_PUBLIC_API_URL=_NEXT_PUBLIC_API_URL_
I follow a simple pattern for intermediate values: _{env_var_name}_, as this approach makes it easier to search for and replace these placeholders in the client bundle.
Now you can copy this file into your Docker container before running yarn build, allowing Next.js to pick up the intermediate values during the build process. Add the following line to your Dockerfile:
...

COPY .docker/.env .env
RUN yarn build

...
Create Docker Entrypoint#
Now comes the core part of the process - creating a Docker entrypoint script that searches for our placeholders in the client bundle and replaces them with actual environment values at runtime. Here’s the entrypoint script:
#!/usr/bin/env sh

set -e

# Get environment variables and filter NEXT_PUBLIC_ ones.
printenv | grep NEXT_PUBLIC_ | while read -r ENV_LINE ; do
  # Separate the key and value parts from the found lines.
  ENV_KEY=$(echo $ENV_LINE | cut -d "=" -f1)
  ENV_VALUE=$(echo $ENV_LINE | cut -d "=" -f2)

  # Find all the places where our intermediate values are set and replace them using actual values.
  find .next -type f -exec sed -i "s|_${ENV_KEY}_|${ENV_VALUE}|g" {} \;
done

# Execute the application main command.
exec "$@"
This script ensures that placeholders like _NEXT_PUBLIC_ENV_ and _NEXT_PUBLIC_API_URL_ in the .next directory (the built client bundle) are replaced with the actual environment variables passed to the container. Finally, it executes the main command passed to the container (exec "$@").
Now let’s add this entrypoint script to our Docker container. Here’s how you can update your Dockerfile to copy the script and set it as the container’s entrypoint:
...

COPY .docker/docker-entrypoint.sh /usr/local/bin/docker-entrypoint.sh

# Set the entrypoint to the newly added script.
ENTRYPOINT ["/usr/local/bin/docker-entrypoint.sh"]

# Default command to run the Next.js application.
CMD ["node", "server.js"]
Testing the Docker Container#
Now we can test the prebuilt container by running it with different environment variables and verifying the output.
Let’s start with the staging environment:
docker run --rm -e NEXT_PUBLIC_ENV=stage -e NEXT_PUBLIC_API_URL=https://stg-api.example.com -p 3000:3000 next-app
Next, replace the environment variables with production values:
docker run --rm -e NEXT_PUBLIC_ENV=prod -e NEXT_PUBLIC_API_URL=https://api.example.com -p 3000:3000 next-app
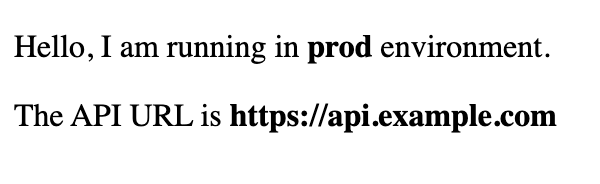
As you can see, we now have a single Docker container that dynamically picks up environment-specific values from the provided environment variables at runtime. This approach eliminates the need to rebuild the container for different environments, ensuring flexibility and adherence to the 12-factor app methodology.
Measuring the Time#
You might say that the find-and-replace process could be slow and delay the container startup, but in practice, it takes only a few milliseconds to execute the entrypoint script. To verify this, let’s do a simple benchmark by adding code to measure the execution time of the script.
Here’s how you can modify your docker-entrypoint.sh script to log the execution time:
#!/usr/bin/env sh

set -e

# Start the timer.
START_TIME=$(date +%s%3N)

# Get environment variables and filter NEXT_PUBLIC_ ones.
printenv | grep NEXT_PUBLIC_ | while read -r ENV_LINE ; do
  # Separate the key and value parts from the found lines.
  ENV_KEY=$(echo $ENV_LINE | cut -d "=" -f1)
  ENV_VALUE=$(echo $ENV_LINE | cut -d "=" -f2)

  # Find all the places where our intermediate values are set and replace them using actual values.
  find .next -type f -exec sed -i "s|_${ENV_KEY}_|${ENV_VALUE}|g" {} \;
done

# End the timer and calculate elapsed time.
END_TIME=$(date +%s%3N)
ELAPSED_TIME=$((END_TIME - START_TIME))

echo "Entrypoint script executed in ${ELAPSED_TIME} ms"

# Execute the application main command.
exec "$@"
In my case, I’m running Orbstack on my M3 MacBook Pro, and the result for replacing two variables is 1 ms, which is negligible in a containerized infrastructure. This shows that the entrypoint script execution time is minimal and doesn’t introduce any noticeable delay to the container startup process.
Summary#
In this blog, we explored a practical approach to managing environment variables dynamically in a Dockerized Next.js application. By using intermediate placeholders and replacing them at runtime with a custom Docker entrypoint, we overcame the limitation of environment variables being fixed at build time. This method ensures that a single Docker image can be deployed across multiple environments without needing to rebuild the image for each environment.
Although this solution was demonstrated with a Next.js app, it’s not limited to Next.js alone. The same approach can be applied to other frontend frameworks and libraries, such as React, NuxtJS, or even plain JavaScript apps. If your application requires dynamic environment-specific values in a containerized setup, this strategy provides a flexible, efficient, and reusable solution.
By adopting this technique, you can ensure faster deployments, maintain a single build pipeline, and stay aligned with best practices, such as the 12-factor app methodology.