Secure Kubernetes Apps with Cert-Manager and Let’s Encrypt

Introduction#
In today’s digital landscape, securing websites with SSL (Secure Sockets Layer) is essential. SSL not only encrypts data in transit, ensuring privacy and security for users, but also builds trust and improves the credibility of your application. Kubernetes, combined with cert-manager and Let’s Encrypt, makes managing SSL certificates seamless and automated.
In this guide, we’ll demonstrate how to secure a Kubernetes-based web service with SSL. To make it engaging, we’ll deploy a Star Wars-themed demo service accessible at https://deathstar.abgeo.cloud. This service displays Death Star-related information and serves as a practical example of securing an application with cert-manager and Let’s Encrypt.
By the end of this tutorial, you’ll have a working example of how to set up SSL in Kubernetes and the knowledge to apply this to your own projects. Ready your Kubernetes cluster, and let’s ensure your services are as secure as the Empire’s most formidable creation. May the Force of SSL certificates be with you!
Prerequisites#
Before diving into the setup, ensure you have the following:
A Kubernetes Cluster
- A running Kubernetes cluster with at least one worker node.
- Tools like Minikube, Kind, or a managed Kubernetes service (e.g., GKE, AKS, or EKS) are sufficient.
kubectl Installed
- The Kubernetes command-line tool must be installed and configured to communicate with your cluster.
Ingress Controller
- An ingress controller (e.g., NGINX or Traefik) must be deployed and properly configured in your cluster to manage HTTP and HTTPS traffic. In this tutorial I’ll be using NGINX Ingress Controller.
Cert-Manager Installed
- Cert-manager must be installed and configured to issue and manage certificates. Follow the cert-manager installation guide to set it up.
DNS Configuration
- A domain name (e.g., abgeo.cloud) pointing to your Kubernetes cluster’s ingress controller. Ensure the DNS is properly configured.
Prepare Resources#
In this section, we will set up the foundational components required for our demo. This includes deploying a simple HTTP service and provisioning an Ingress resource to route traffic to the service. At this stage, we will configure the Ingress without SSL to ensure the basic setup is working correctly before adding encryption.
We won’t dive deep into the specifics of deploying a Kubernetes cluster, setting up an Ingress controller, or installing cert-manager. It is assumed that these steps are already completed in your infrastructure.
First, let’s create a deployment for the cilium/starwars Docker image. You can create it directly with the following command:
cat <<EOF | kubectl apply -f -
apiVersion: apps/v1
kind: Deployment
metadata:
  name: deathstar
  labels:
    app: deathstar
spec:
  replicas: 1
  selector:
    matchLabels:
      app: deathstar
  template:
    metadata:
      labels:
        app: deathstar
    spec:
      containers:
        - name: deathstar
          image: cilium/starwars
          ports:
            - containerPort: 80
EOF
Note: Alternatively, you can save this YAML configuration to a file (e.g., deployment.yaml) and apply it using the command: kubectl apply -f deployment.yaml. However, for simplicity and to streamline the process, we’ll use the inline cat <<EOF syntax throughout this tutorial. This approach allows you to execute the commands directly without needing to manage separate YAML files.
The next essential step is to create a Service definition for the deathstar deployment. This Service will expose the Pod internally within the cluster using a ClusterIP:
cat <<EOF | kubectl apply -f -
apiVersion: v1
kind: Service
metadata:
  name: deathstar
  labels:
    app: deathstar
spec:
  type: ClusterIP
  ports:
    - port: 80
      name: http
      targetPort: 80
  selector:
    app: deathstar
EOF
Finally, let’s create the Ingress resource to expose the deathstar service externally. This resource defines how external traffic will be routed to your service. Use the following command to apply the Ingress configuration:
cat <<EOF | kubectl apply -f -
apiVersion: networking.k8s.io/v1
kind: Ingress
metadata:
  name: deathstar
  labels:
    app: deathstar
spec:
  ingressClassName: nginx
  rules:
    - host: deathstar.abgeo.cloud
      http:
        paths:
          - path: /
            pathType: Prefix
            backend:
              service:
                name: deathstar
                port:
                  name: http
EOF
Now, let’s test our setup by accessing the deathstar.abgeo.cloud/v1 resource using curl. This will help us verify that the Ingress is routing traffic correctly.
Testing with HTTP#
First, test access to the resource using the HTTP protocol:
curl http://deathstar.abgeo.cloud/v1
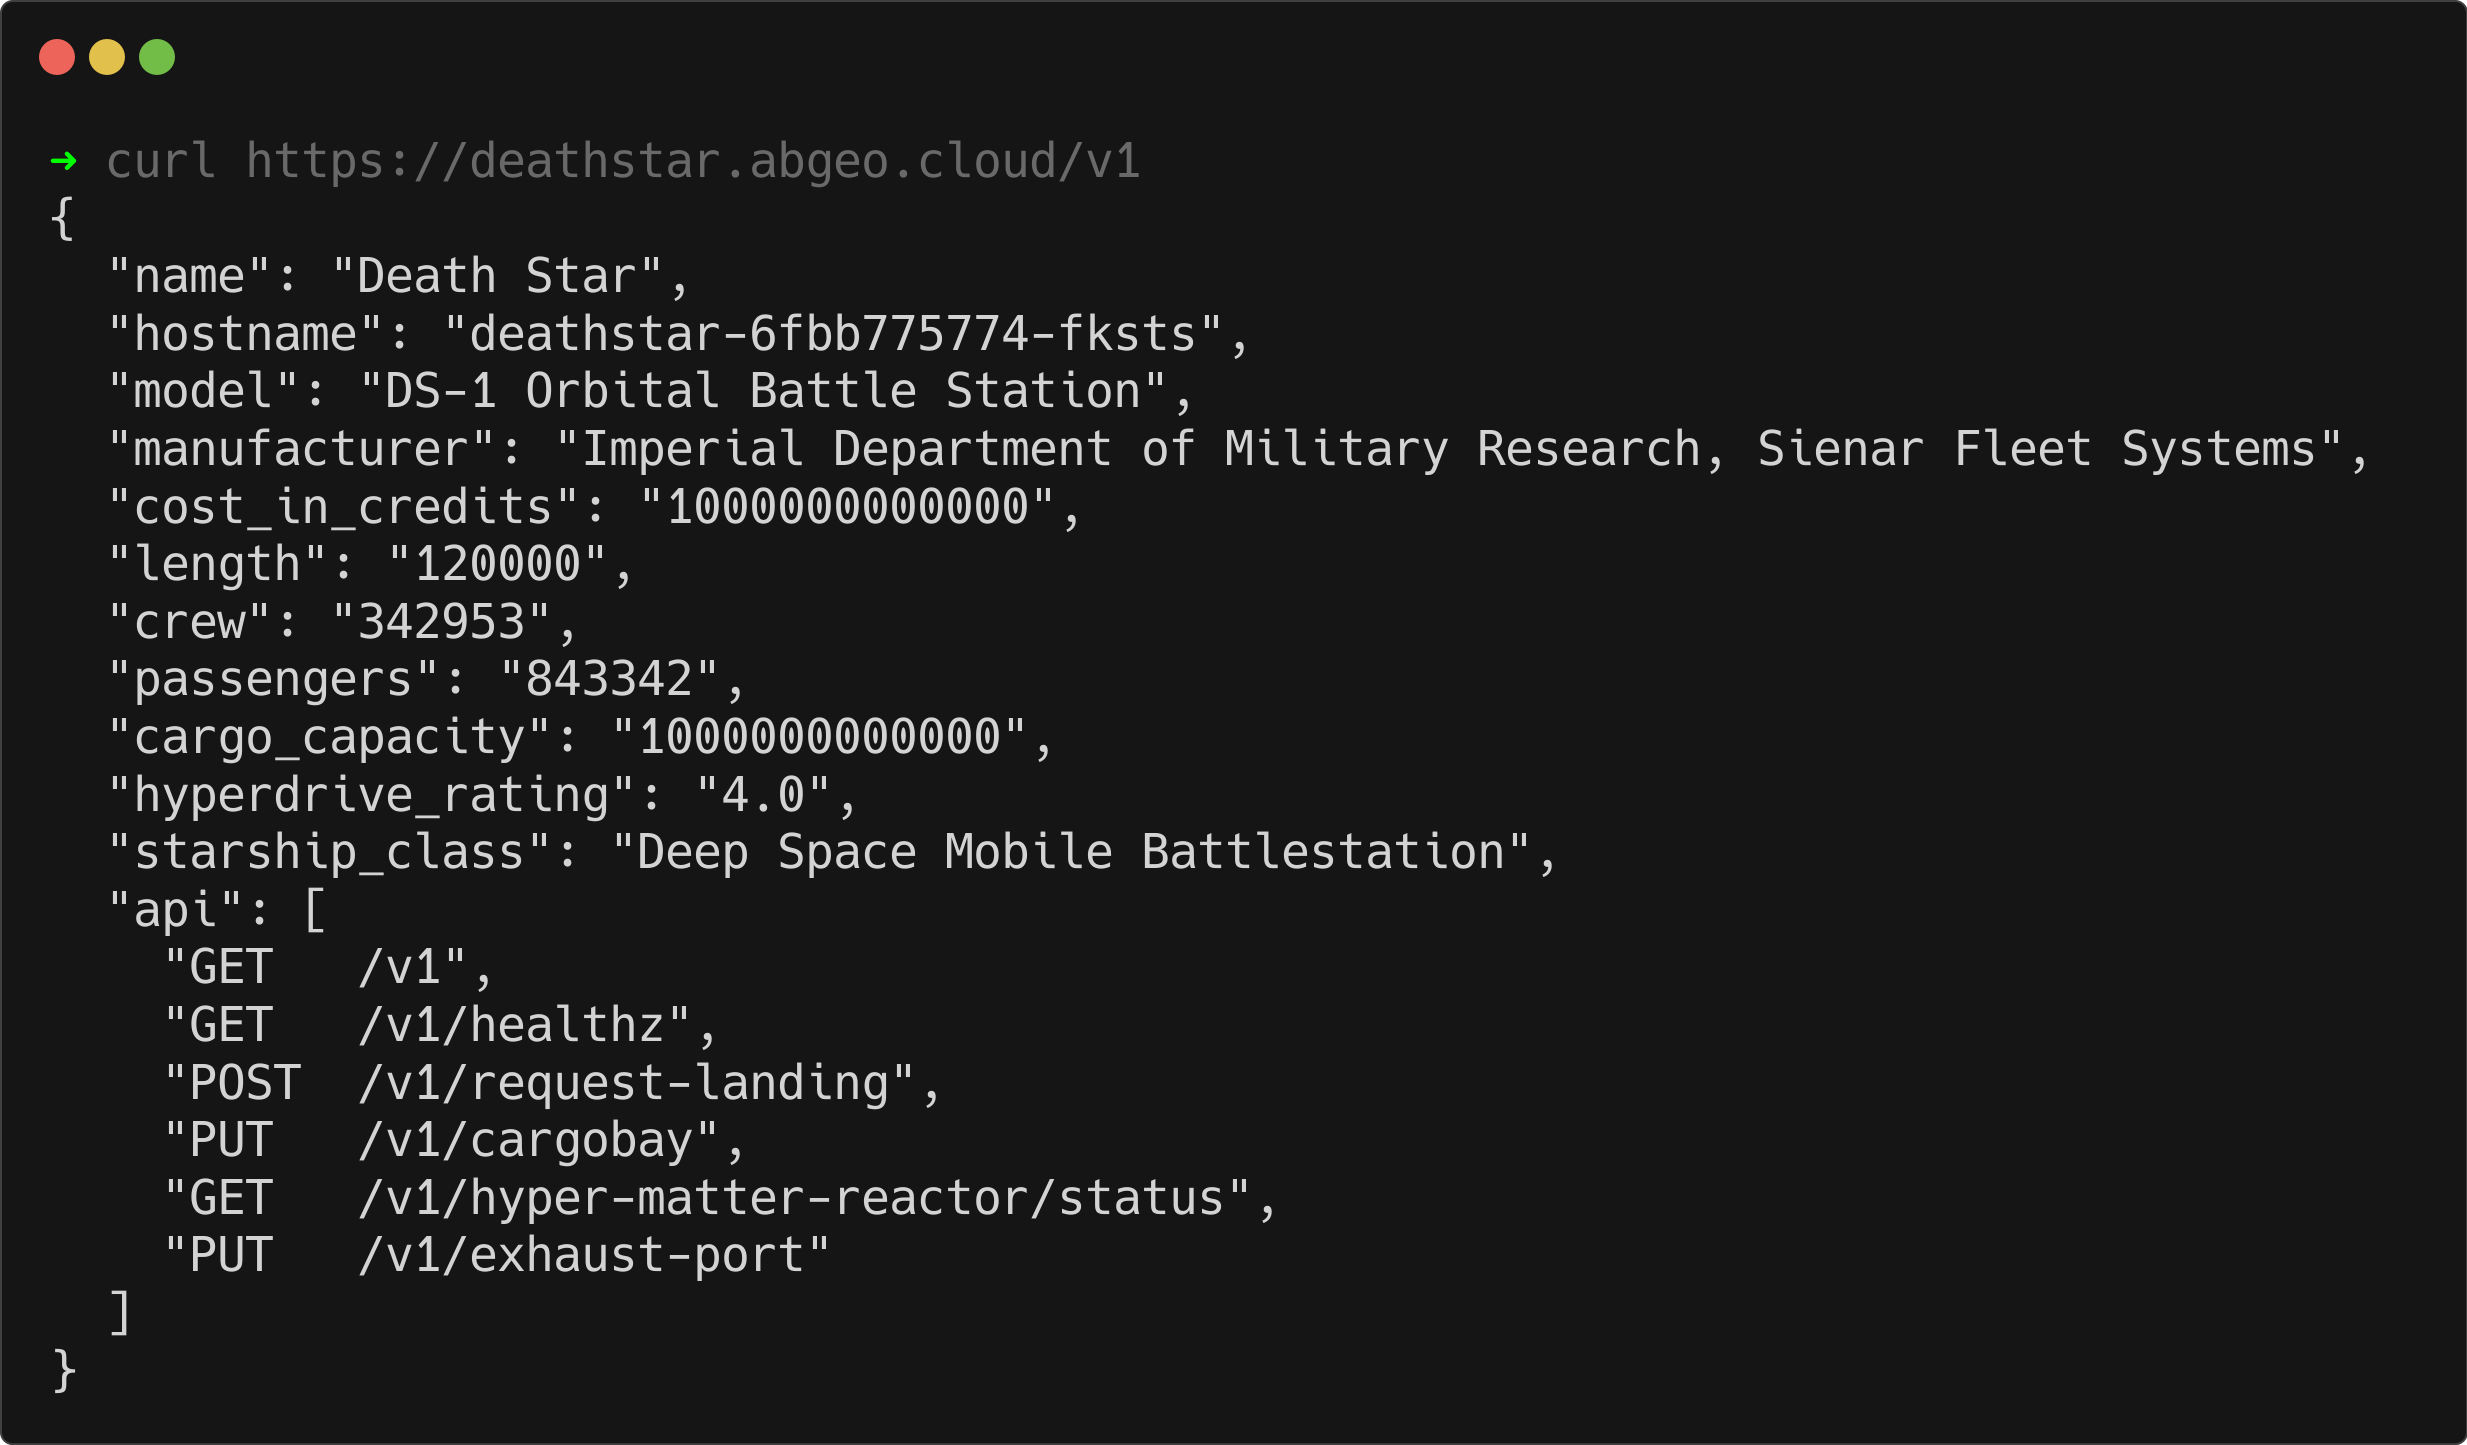
You should see a successful response containing Death Star-related information:

Testing with HTTPS#
Next, test access using the HTTPS protocol:
curl https://deathstar.abgeo.cloud/v1
As expected, you will encounter an error here because the Ingress is not yet configured to handle SSL connections:
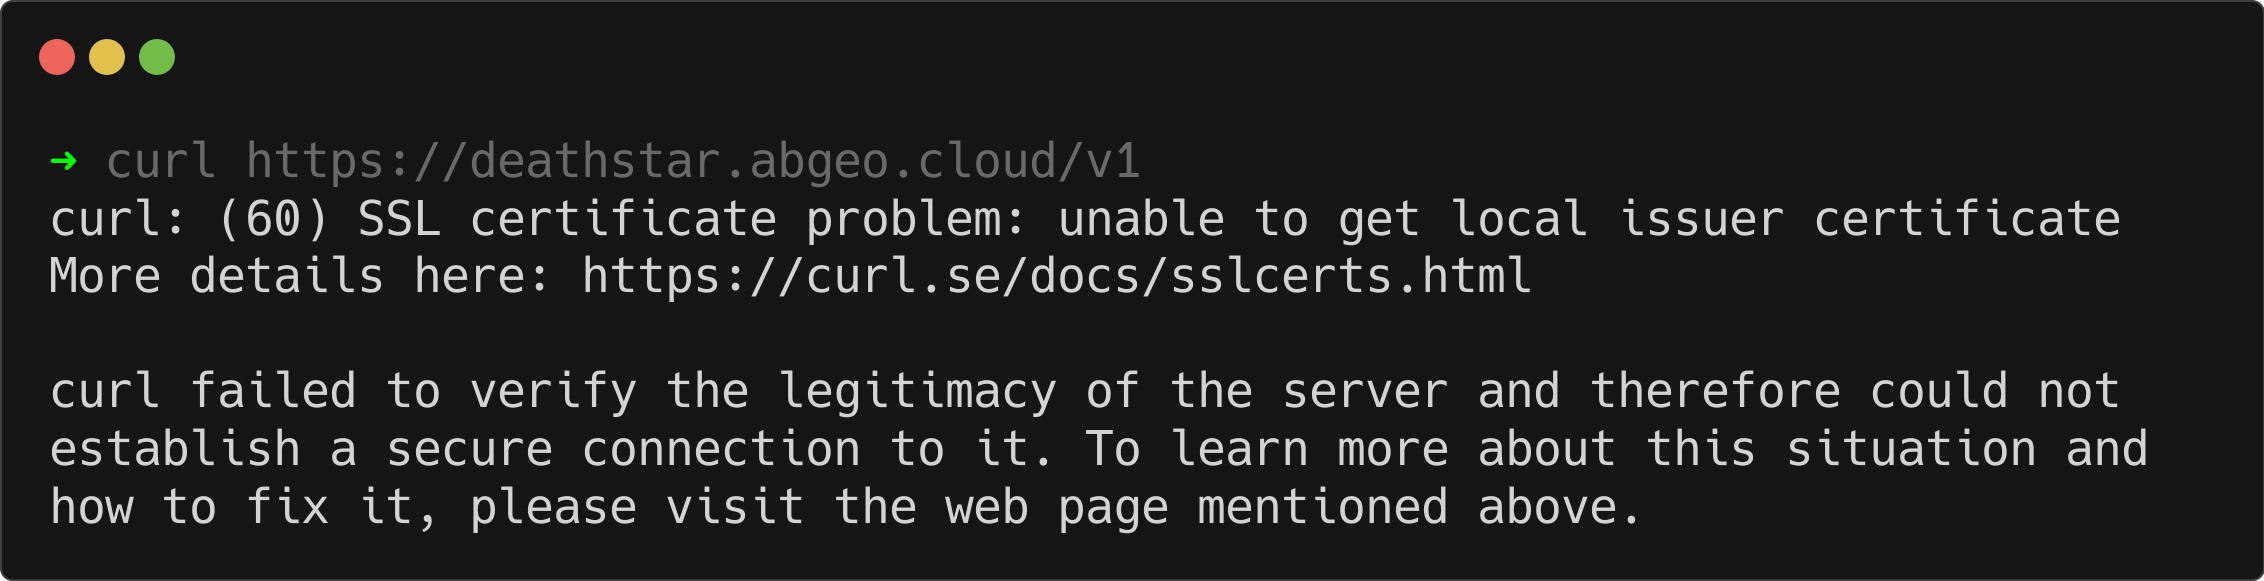
We will address this issue in the next section by configuring SSL for our Ingress, enabling secure connections to the Death Star service. Stay tuned!
Setting Up SSL with Cert-Manager#
Securing your application with SSL can be effortless when leveraging cert-manager, a Kubernetes-native tool designed for managing certificates. Cert-manager simplifies the process by automating the issuance and renewal of SSL certificates, making it an ideal choice for securing applications. It supports a wide range of certificate issuers, including self-signed certificates, Vault, Venafi, and many more. See the complete list of supported issuers here.
For this tutorial, we’ll use the ACME issuer configured with Let’s Encrypt, a highly trusted and free service for issuing SSL certificates. This ensures your applications are secure, accessible, and follow modern best practices.
In this section, we’ll guide you through configuring SSL for the Death Star service, making it securely accessible at https://deathstar.abgeo.cloud.
Setting Up an Issuer#
The first step is to set up a certificate issuer resource for your cluster. Cert-manager provides two types of issuer resources in the cert-manager.io namespace:
ClusterIssuer: A cluster-wide resource used to provision certificates across all namespaces within the Kubernetes cluster.Issuer: A namespace-scoped resource, which is restricted to provisioning certificates only within the namespace where it is created.
For most use cases involving certificates shared across multiple namespaces, a ClusterIssuer is recommended. However, if you want to limit certificate management to a specific namespace, an Issuer is the appropriate choice.
In the following steps, we will configure a ClusterIssuer to enable SSL provisioning for the Death Star service.
Let’s Encrypt provides two environments for its ACME-compatible API: staging and production.
- The staging environment is intended for testing and development purposes. It allows you to test certificate issuance without worrying about hitting rate limits. However, certificates issued in staging are not trusted by browsers and cannot be used in production environments.
- The production environment is used for live, trusted SSL certificates that are recognized by browsers and suitable for securing real applications.
It is highly recommended to deploy both issuers in your cluster. Using the staging issuer during development and testing ensures that you can verify your configurations without impacting production or exceeding rate limits. Once verified, you can seamlessly switch to the production issuer for live deployments.
Let’s deploy instances of both staging and production ClusterIssuers.
Creating a Staging ClusterIssuer#
The following command creates a staging ClusterIssuer that communicates with Let’s Encrypt’s staging environment. This is ideal for testing and validation:
cat <<EOF | kubectl apply -f -
apiVersion: cert-manager.io/v1
kind: ClusterIssuer
metadata:
  name: letsencrypt-staging
spec:
  acme:
    server: https://acme-staging-v02.api.letsencrypt.org/directory # URL of the staging server
    email: devops@abgeo.cloud # Update with your email address
    privateKeySecretRef:
      name: letsencrypt-staging # Secret to store the private key
    solvers:
      - http01:
          ingress:
            ingressClassName: nginx # Update to match your ingress class
EOF
This configuration:
- Sets the server to Let’s Encrypt’s staging API endpoint.
- Specifies an email address for receiving expiration notifications or other important updates.
- Defines a secret (
letsencrypt-staging) where the private key is stored securely. - Configures an HTTP-01 solver to use the NGINX ingress class for HTTP challenge verification.
Run the above command to create the staging ClusterIssuer.
What is the HTTP-01 Solver?#
Cert-manager supports multiple solvers for validating certificate requests, such as HTTP-01, DNS-01, and TLS-ALPN-01. In this case, we are using the HTTP-01 solver, which works as follows:
- Let’s Encrypt sends an HTTP request to a specific path (
/.well-known/acme-challenge/) on your domain. - Cert-manager automatically configures an Ingress resource to serve the required challenge response.
- Once Let’s Encrypt verifies the response, it issues the requested certificate.
The HTTP-01 solver is a great choice when your domain is publicly accessible via an Ingress resource. For this configuration, we specify the NGINX ingress class to handle the HTTP challenges.
Creating a Production ClusterIssuer#
After validating the staging issuer configuration, we can deploy the production ClusterIssuer. This will request browser-trusted certificates from Let’s Encrypt’s production API.
cat <<EOF | kubectl apply -f -
apiVersion: cert-manager.io/v1
kind: ClusterIssuer
metadata:
  name: letsencrypt-prod
spec:
  acme:
    server: https://acme-v02.api.letsencrypt.org/directory # URL of the production server
    email: devops@abgeo.cloud # Update with your email address
    privateKeySecretRef:
      name: letsencrypt-prod # Secret to store the private key
    solvers:
      - http01:
          ingress:
            ingressClassName: nginx # Update to match your ingress class
EOF
With these steps complete, we now have both staging and production ClusterIssuers configured in our Kubernetes cluster. These issuers are ready to validate our domain and issue SSL certificates.
Using the staging issuer, we can safely test our configurations without impacting production limits. Once verified, the production issuer will provide browser-trusted certificates for our applications.
With this setup in place, we’re now ready to issue a certificate for our Ingress resource and secure the Death Star service at https://deathstar.abgeo.cloud. Let’s move on to the next step!
Request Staging Certificate#
Now that we have configured the staging ClusterIssuer, we can request a staging certificate for our Ingress resource. This step will validate the domain and issue a temporary certificate to ensure everything is correctly configured before moving to production.
The cert-manager API provides a Certificate resource that allows us to manually request and issue SSL certificates. However, for a more automated and seamless approach, we’ll leverage the cert-manager.io/cluster-issuer annotation directly on our Ingress resource.
By including this annotation, the ingress-shim sub-component of cert-manager will automatically detect changes to the Ingress resource, process the certificate request, and issue the certificate seamlessly. This approach streamlines certificate management and eliminates the need for complex manual configurations.
Let’s modify the Ingress resource to include the necessary annotation so that cert-manager can handle the certificate issuance. We instruct cert-manager to use the referenced ClusterIssuer for managing the SSL certificate.
Use the following command to update the Ingress resource:
cat <<EOF | kubectl apply -f -
apiVersion: networking.k8s.io/v1
kind: Ingress
metadata:
  name: deathstar
  labels:
    app: deathstar
  annotations:
    cert-manager.io/cluster-issuer: "letsencrypt-staging" # We are specifiing the staging cluster issuer reference for testing purposes
spec:
  ingressClassName: nginx
  rules:
    - host: deathstar.abgeo.cloud
      http:
        paths:
          - path: /
            pathType: Prefix
            backend:
              service:
                name: deathstar
                port:
                  name: http
  tls: # Including the host in the TLS config ensures it's added to the certificate's subjectAltNames
    - secretName: deathstar-tls # Cert-manager will store the issued certificate in this secret
      hosts:
        - deathstar.abgeo.cloud
EOF
Explanation:
- Annotation: The
cert-manager.io/cluster-issuer: "letsencrypt-staging"annotation specifies that cert-manager should use theletsencrypt-stagingClusterIssuer for certificate management. - TLS Section block defines:
- The secretName (
deathstar-tls) where cert-manager will store the issued certificate and private key. - The hosts field, which lists the domains to be included in the certificate’s
subjectAltNames.
- The secretName (
Verifying the Configuration#
After applying the updated Ingress resource, we can verify that the Certificate and Secret resources are created successfully by cert-manager.
Step 1: Verify the CertificateRequest Resource#
The first step is to confirm that a CertificateRequest was created and approved successfully. Run the following command:
kubectl get certificaterequests.cert-manager.io

As shown in the output, the request was created successfully, and both the Approved and Ready fields are True. This indicates that the CertificateRequest has been processed and approved by cert-manager.
Step 2: Verify the Certificate Resource#
Next, verify that the Certificate resource associated with the request was created:
kubectl get certificates.cert-manager.io
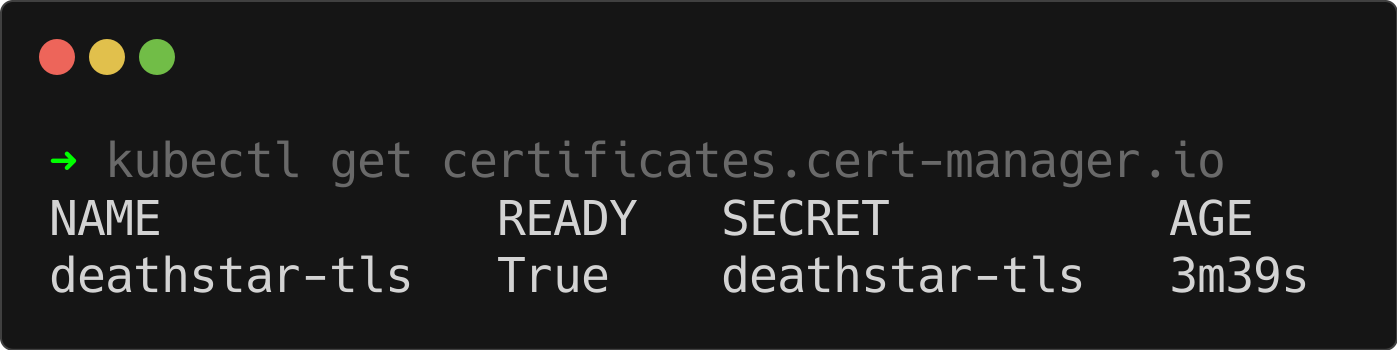
As expected, the Certificate resource was created successfully. This confirms that cert-manager is ready to generate and manage the associated Kubernetes secret.
Step 3: Verify the Secret Resource#
Finally, confirm that the Secret resource containing the issued certificate and private key was created:
kubectl get secrets
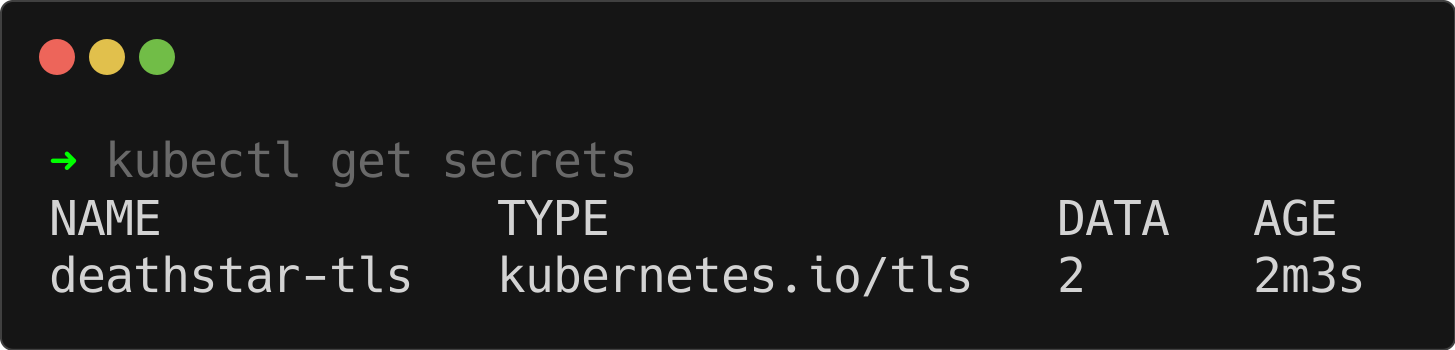
The output shows that the Kubernetes secret (deathstar-tls) has been created successfully. This secret contains the certificate and private key needed to establish secure HTTPS connections.
With these steps complete, you have successfully issued and verified a staging SSL certificate for your Ingress resource. In the next section, we’ll test the HTTPS connection and finalize the setup.
Test Staging Certificate#
It appears that an SSL certificate is now associated with our Ingress resource. Let’s test the HTTPS connectivity to our domain:
curl https://deathstar.abgeo.cloud/v1

Wait—there’s still a certificate issue for this domain! Don’t worry, this is expected. Let me explain why: as mentioned earlier, Let’s Encrypt Staging certificates are not trusted by browsers or most clients. These certificates are intended for testing the certificate generation flow and are not meant for production use.
Verifying Certificate Details#
To confirm that a certificate is indeed issued and associated with our domain, we can use openssl to check its issuer and subject:
echo | openssl s_client -showcerts -servername deathstar.abgeo.cloud -connect deathstar.abgeo.cloud:443 2>/dev/null | openssl x509 -noout -issuer -subject

The output shows:
- Issuer:
(STAGING) Wannabe Watercress R11— indicating that the certificate was issued by Let’s Encrypt’s staging server. - Subject:
deathstar.abgeo.cloud— confirming that the certificate is correctly associated with our domain.
This validates that the certificate generation process is working as expected.
Now that the staging certificate is verified, it’s time to request a production certificate for our domain. This will ensure the certificate is browser-trusted and suitable for live environments. We’ll cover this process in the next section. Stay tuned!
Request Production Certificate#
To request the production certificate for our Ingress resource, we only need to update one line in the manifest. By changing the value of the cert-manager.io/cluster-issuer annotation from letsencrypt-staging to letsencrypt-prod, we instruct cert-manager to use the production issuer instead of the staging one.
Here’s the updated manifest:
cat <<EOF | kubectl apply -f -
apiVersion: networking.k8s.io/v1
kind: Ingress
metadata:
  name: deathstar
  labels:
    app: deathstar
  annotations:
    cert-manager.io/cluster-issuer: "letsencrypt-prod" # Switch to the production ClusterIssuer
spec:
  ingressClassName: nginx
  rules:
    - host: deathstar.abgeo.cloud
      http:
        paths:
          - path: /
            pathType: Prefix
            backend:
              service:
                name: deathstar
                port:
                  name: http
  tls:
    - secretName: deathstar-tls
      hosts:
        - deathstar.abgeo.cloud
EOF
To see the changes after updating the Ingress to use the production ClusterIssuer, let’s check the CertificateRequests created by cert-manager:
kubectl get certificaterequests.cert-manager.io

As shown in the output, we now have a second CertificateRequest (deathstar-tls-2) which is also marked as Approved and Ready. This indicates that cert-manager has successfully processed the request and issued a certificate for the Ingress resource.
Now, let’s test the HTTPS connectivity to ensure the production certificate is working as expected:
curl https://deathstar.abgeo.cloud/v1
The response confirms that the Ingress is now secured with a trusted production certificate from Let’s Encrypt. Your application is officially secured and ready to handle HTTPS traffic. 🎉
Bonus: Let’s Explode the Death Star!#
What better way to end our tutorial than with a bit of Star Wars-themed fun? Let’s simulate taking down the Death Star by exploiting its infamous design flaw—the exhaust port!
Run the following command to trigger the explosion:
curl -X PUT -H 'X-Has-Force: True' https://deathstar.abgeo.cloud/v1/exhaust-port
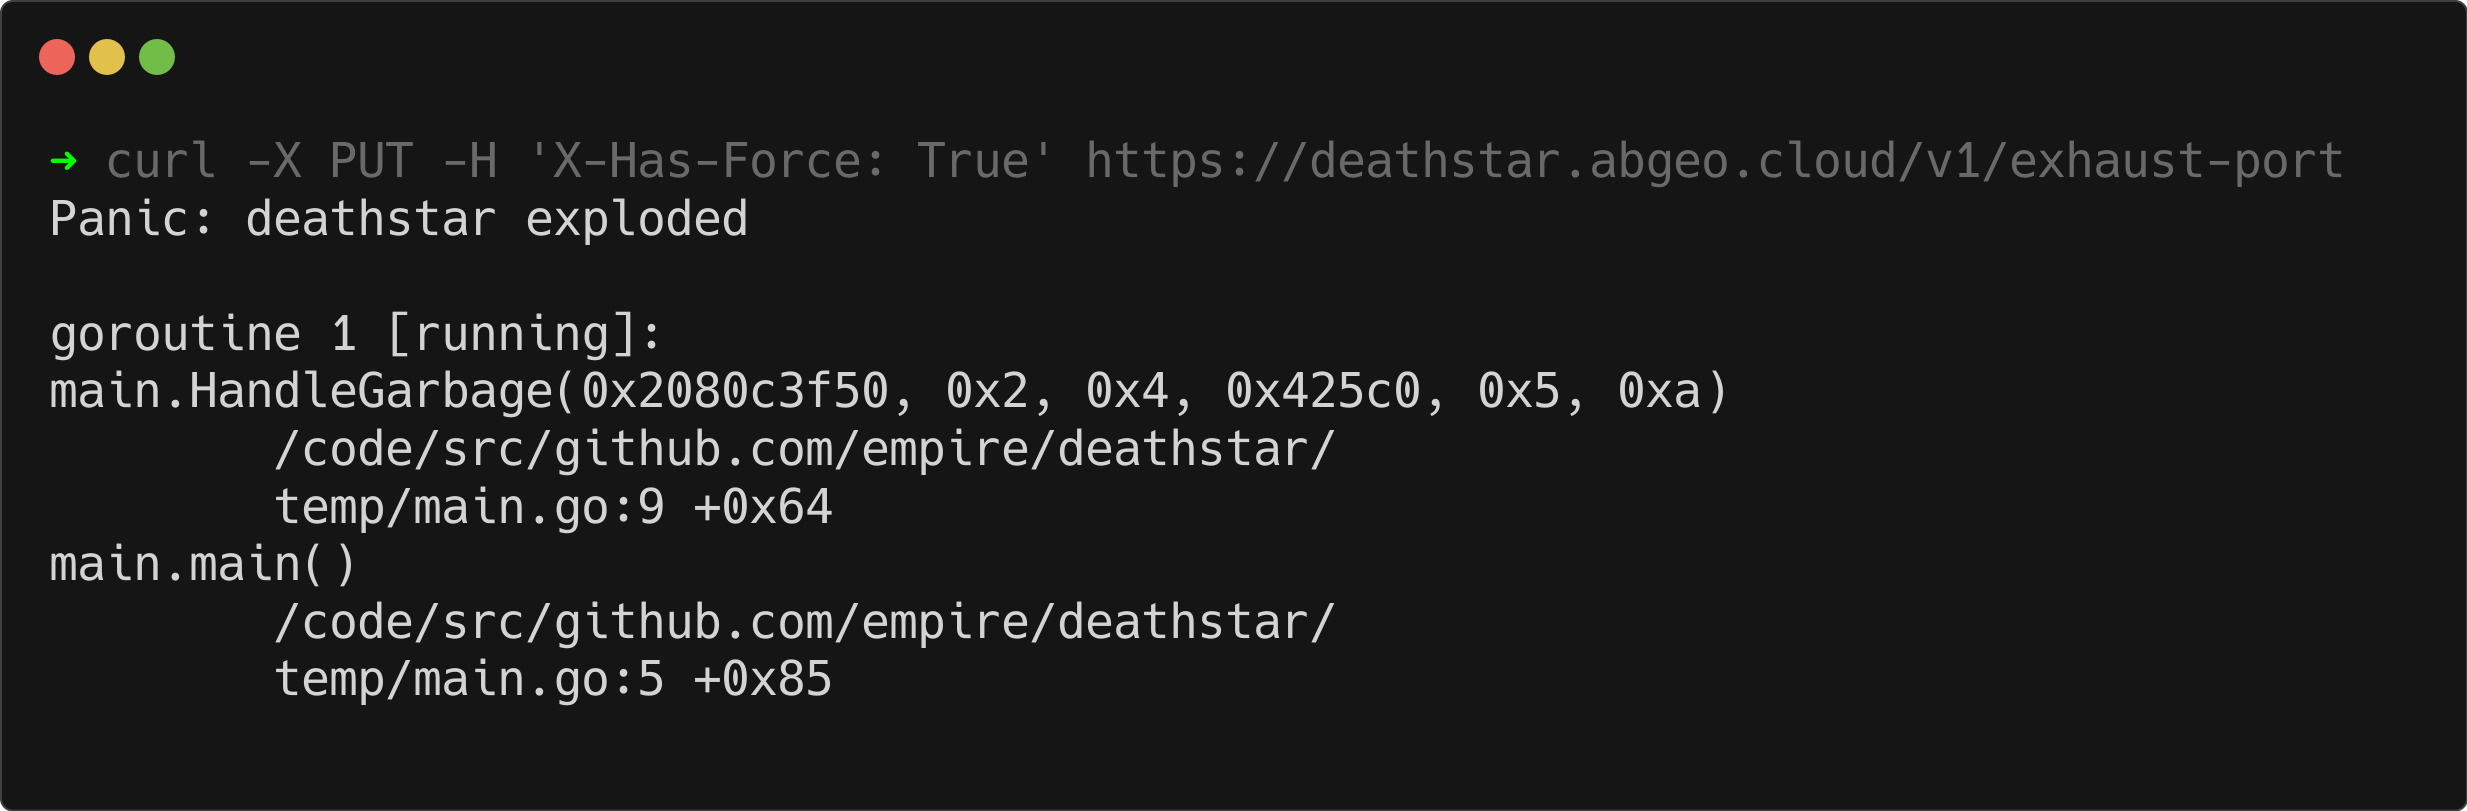
And just like that, the Death Star is no more! 💥 May the Force be with you as you secure and scale your Kubernetes applications. 🚀
Summary#
In this tutorial, we secured a Kubernetes-based application using cert-manager and Let’s Encrypt. Starting with a simple HTTP service, we configured Ingress resources, set up staging and production ClusterIssuers, and automated SSL certificate management. We tested the setup with staging certificates, verified the certificate generation process, and transitioned to a trusted production certificate.
By following these steps, you’ve created a reliable and automated SSL solution, ensuring secure HTTPS connections for your Kubernetes workloads. This approach not only simplifies certificate management but also establishes a solid foundation for securing your applications.